
Scheduling a meeting in an organization symbolize that be
present on time at particular date and place for the discussion. Using
Microsoft Outlook you can create the meeting schedule and invite you all your
friends easily. Through this you can track the meetings schedule and escape
from disappointments. You know that MS Outlook uses e-mail and calendar for
finding the details of this kind of information. To organize the schedule of
meeting use the following and understand the presentation of the people.
Steps for
scheduling meeting Requesting In Outlook!!
For MS Outlook
2007
Step 1 :- In Outlook 2007: Go
to file
menu, click on new >>meeting request. Or press
short-cut key CTRL +SHIFT +Q.

An Untitled meeting
box will be opened.

Step 2:- Type the “Title of meeting” in “Subject box” and “Location of meeting” in the “Location
box”.

Step 3:- Select the start
and end time for the meeting.

Note:- If you want to
schedule this meeting every day then click on All Day Event check box.
Step for MS Outlook 2010 and 2013 is same
Step 1:- Select the "Calendar" from the left pane of MS outlook Go to Home
Tab, click on new meeting.

An Untitled meeting
box will be opened.

Step 2:- In this box, set the Date and Time, and Description.
- In the Subject box, type a description.
- If you want to schedule this meeting every day then click on All Day Event check box.
- In the meeting request body, type any information that you want to share with the recipients. You can also attach files.

NOTE:- If you want to schedule meetings based on
an alternate time zone, on the Meeting tab, in the Options group, click Time
Zones.

Step 3:- In the Location box, type the meeting’s Location.

Step 4:- Click On the Meeting tab, in
the Show group, click “Scheduling”
Assistant.
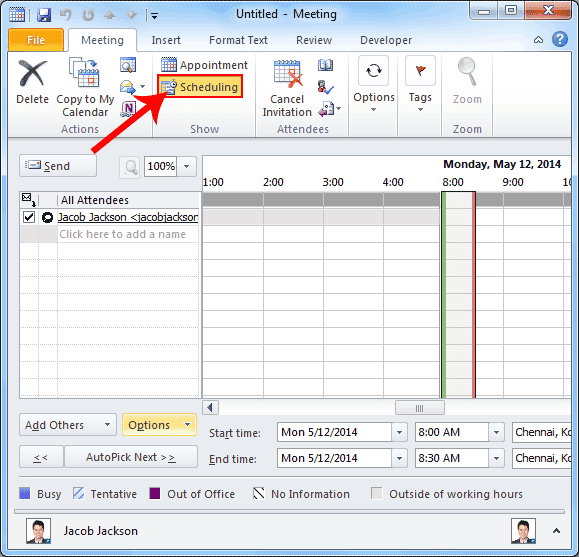 Note:- Scheduling is another feature has been added into the meeting. It means, you can add more people in your meeting after creating the meeting events in Outlook. In this you can add people through contact list, recipient etc, Once you are ready to sent invitations then send it directly within the scheduling assistant, The Scheduling Assistant helps you find the
best time for your meeting.
Note:- Scheduling is another feature has been added into the meeting. It means, you can add more people in your meeting after creating the meeting events in Outlook. In this you can add people through contact list, recipient etc, Once you are ready to sent invitations then send it directly within the scheduling assistant, The Scheduling Assistant helps you find the
best time for your meeting.
Step 5:- Click “Add
Others”, and then click Add from Address Book.

Step 6:- Click the name from the Results list, then
click “Required”, "Optional", or "Resources", and then click “OK”.

"Required" and "Optional" attendees appear in the "To box" on the "Meeting tab", and "Resources" appear in the Location box.

Once you send this schedule to the recipients, or attendees, then
they will get two options (accept and
decline). However, they accept the meetings request then it will
automatically add into the calendar circular, if they decline, then you will get
notification from the recipient response.
Click on the Appointment button from the
ribbon area and go back and edit the invitation email quickly.
After some time you will see that meeting has been added into
your calendar, once the email invitation accepted by the clients.
No comments :
Post a Comment